How to Replace Door Handles (Tools & Step-by-Step Guide)
Replacing door handles is an easy way to refresh your home. With the right tools and a little guidance, you’ll have new handles installed in no time. Here’s everything you need to get started.
Replacing door handles is one of the easiest ways to refresh your home’s look. It’s a simple DIY project that doesn’t require a lot of time, skill, or fancy equipment. But like any job, having the right tools makes all the difference.
Whether you’re swapping old handles for something more modern or upgrading to premium door handle finishes, these tools will help you get the job done quickly and without unnecessary headaches.
Tools You’ll Need
Before you begin, make sure you have all the necessary tools on hand. Having the right equipment will save time and help with a professional-looking finish.
Essential Tools:
-
Phillips-head screwdriver
-
Flathead screwdriver
-
Allen key (for some modern handles)
-
Tape measure
-
Utility knife
-
Chisel and hammer
-
Level
-
Masking tape and pencil
Optional but useful:
-
Drill with screwdriver
-
Lubricant (such as WD-40 or graphite powder)
How to Replace Door Handles
Step 1. Wedge open your door & check the current handles
First things first – keep that door steady. Use a doorstop or anything sturdy to wedge it open about halfway. This will give you easy access to both sides of the door and prevent it from swinging around while you work.
Take a closer look at your handle. If there aren’t any visible screws, they’re probably hiding under a cover plate. Grab a flathead screwdriver and gently pry it off to reveal the screws underneath.
Step 2: Remove the Old Handle
Unscrew and Remove
Using a Phillips-head screwdriver, remove the screws on both sides of the door. Once the screws are out, slide the handle off and remove the spindle (the bar that connects both sides of the handle).
Optional: Remove the Latch Mechanism
If your new handle comes with a different latch, you’ll want to swap it out. Unscrew the latch plate on the edge of the door and gently pull out the latch mechanism.
Tip: Hold onto those old screws. Toss them in a jar or container – you never know when they might come in handy for future DIY projects.
Step 3: Prep the Door for the New Handle
Before you dive into installing the new handle, make sure everything is set for a perfect fit. Check that the latch plate sits flush with the door. If it’s sticking out or sitting unevenly, grab a chisel and hammer to carefully adjust the recess.
Now, double-check the backset (the distance from the edge of the door to the centre of the handle hole). Most handles fit a 60mm or 70mm backset, so measure to be sure your new handle lines up properly.
Step 4: Install Your New Handle
Insert the Latch
Slide the new latch into place at the edge of the door. Make sure the slanted side faces the right way – toward the door frame – so it closes properly. Secure it with two screws.
Align and Attach the Handle
Place the spindle through the latch hole and align the handle on one side. Slide it onto the spindle and line it up with the screw holes. Then, attach the other side of the handle.
Secure the Handle
Screw the handle into place on both sides of the door. Be careful not to overtighten—just snug enough to keep it sturdy without damaging the handle or the door.
Step 5: Test and Fine-Tune
Time for the moment of truth! Turn the handle and open and close the door a few times. Does everything move smoothly? If the latch catches or the handle feels loose, adjust the screws and alignment until it’s just right. Once you’re happy, press or screw the cover plates into place for a polished, finished look.
Choosing Your New Door Handles
With so many styles, finishes, and options out there, how do you choose the perfect one? Don’t worry—it’s easier than you think. The key is to balance functionality, style, and practicality while keeping your home’s aesthetic in mind. Here’s what to consider.
Do You Need a Lock?
First, think about whether your new door handles need a lock. This will mostly depend on where the door is.
-
Bathrooms and Bedrooms: Locks are essential for privacy and security. Look for privacy sets that include a locking mechanism.
-
Living Rooms and Hallways: Skip the lock – you won’t need it here. A passage handle will do the job perfectly.
-
Children’s Bedrooms and General Spaces: Avoid locks for safety reasons. The last thing you want is a curious kid accidentally locking themselves in.

This beautiful brushed brass gold door handle & lock is a great option when you want both privacy and style.
If you’re not sure which lock type fits your door, check your current setup and match it with the new handle’s requirements.
What Finish or Colour Should You Choose?
The right finish can completely transform the look of your door and your entire space. Your handle’s colour and texture should complement the overall style of your home.
-
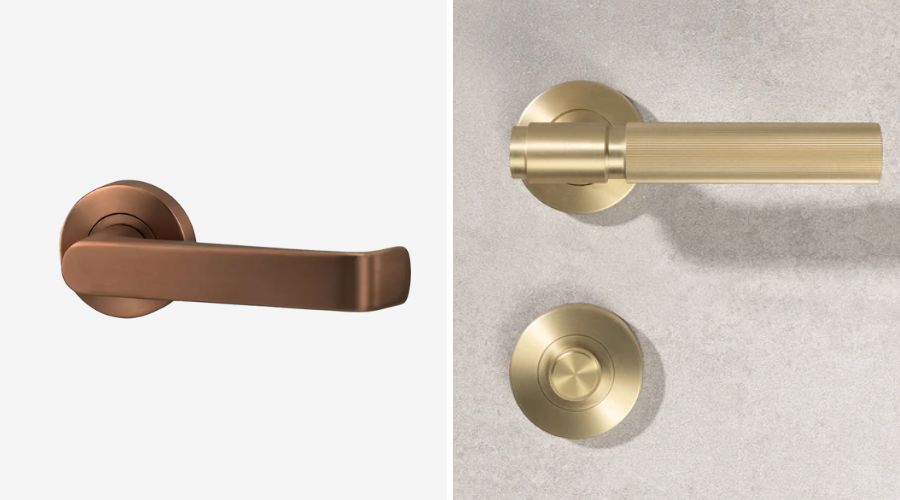
Brushed Brass and Antique Brass: Timeless, warm, and perfect for traditional or period-style interiors.
-
Matte Black: Bold and modern, ideal for contemporary or industrial-inspired spaces.
-
Chrome and Polished Nickel: Sleek and versatile, these finishes work well in almost any setting, offering a clean, minimalist feel.
-
Gunmetal and Satin Bronze: For something a little more unexpected, these finishes add depth and a touch of luxury.
Match your handle finish with your light fittings, tapware, or cabinetry hardware for a cohesive look throughout your home.

This Yale unity entrance door handle in matte black really makes a bold statement.
Size and Coverage Considerations
Style is important, but you’ll need to make sure your new handle covers any holes or marks left by the old one. If you’re replacing a doorknob with a handle, choose a handle with a backplate that’s large enough to cover the existing area.
Also, check the thickness of your door to ensure the handle set is compatible. Standard interior doors are around 35mm thick, but some older or custom doors might vary.
Final Tips on Choosing Your Handle
Think about how your new handles will fit into your daily life. Do you want a statement piece that stands out, or something subtle that blends into the background? Take your time, explore different styles, and don’t be afraid to mix things up – especially if your home features a combination of modern and classic elements.
Once you’ve found the perfect handles, follow our installation guide, and your doors will be looking brand new in no time.

This passage set door handle from Lockwood in bronze is definitely a statement piece!
Elevate Your Home With New Door Handles
Replacing door handles is a quick and easy way to give your home an instant upgrade. With just a few essential tools – like a screwdriver set, tape measure, and level – you can swap old handles for something fresh and stylish in no time.
Ready to upgrade? Check out Buildmat’s range of premium door handles for styles that combine functionality with serious design appeal.